When designing your programs you may run into scenarios where it is useful to create nested decisions. Nested decisions describe the scenario of enclosing one decision into another. It may not seem intuitively obvious why this is necessary, but as your computer programs become more complex, it will be an extremely effective and useful strategy to consider.
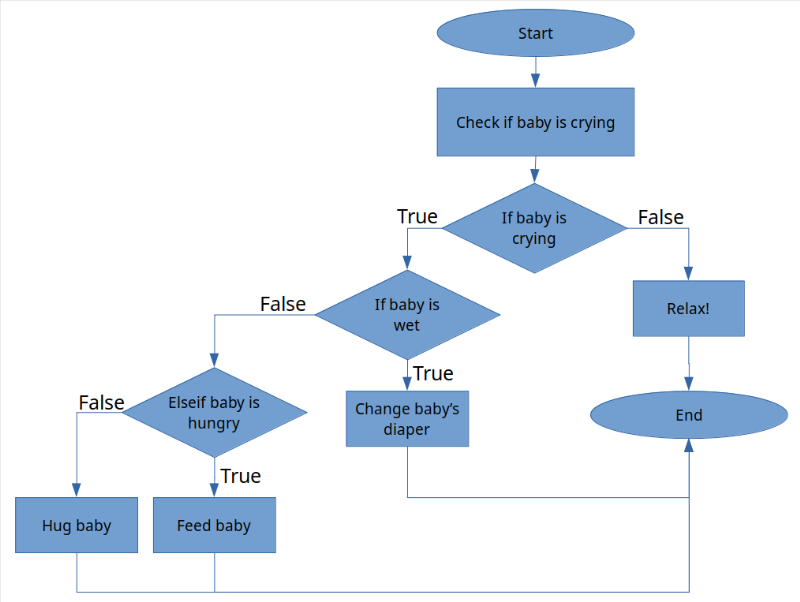
Notice how the “If the baby is wet” condition is nested inside of the “If the baby is crying” condition. That is what we mean by nesting! There is no difference in the way that you write the code. You just can put one if after the other. The only little trick to nesting is remembering that each if needs a corresponding end. When you have several nested decisions, it can get confusing which end keyword is referring to which if keyword. To help organize your code, MATLAB will automatically apply a tab after each if statement. That way you can see what “level” you are in.
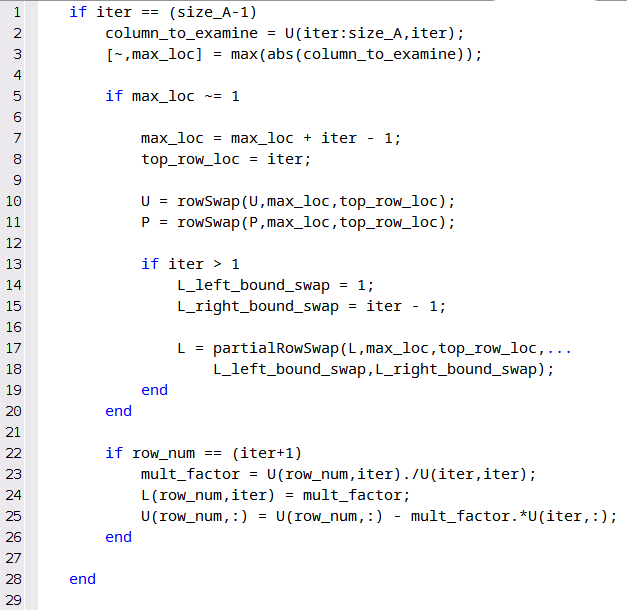
For example, take a look at the code in figure 14.5.3 below. Keep in mind I do not expect you to understand what is happening in this code! (Spoiler: it is actually non-sensical code because I had to change some things to if statements so it didn’t include programming concepts you haven’t seen yet but that is not the point).
You should be able to create a flow chart of this code from figure 14.5.3 alone. The key is to notice that on line 5, there is a nested if statement. Furthermore, there is a 2nd level nested if statement on line 13. The other thing that you should notice is that MATLAB has automatically applied a tab after each if statement.
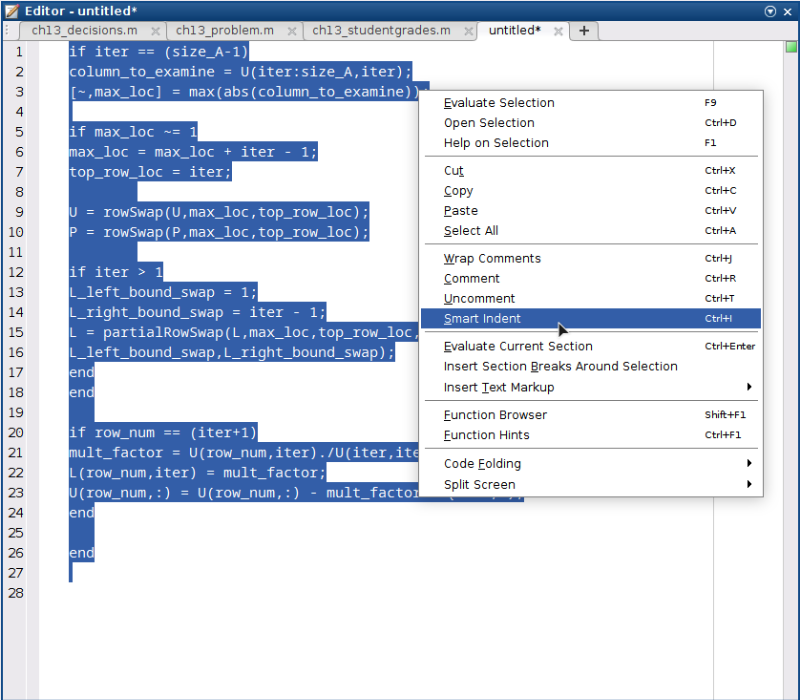
If you ever mess up your tabbing, don’t worry! Just select all your text, right-click, and select the “Smart Indent” option (see below). Again, this is something that you should try yourself.
Figure14.5.5.Selecting text, right-clicking, and then selecting “Smart Indent” will fix any indentation problems your code has and will make it easier to read!