In the previous section you learned how to create a branch. In this section you will learn more about why branching is important and how to switch between existing branches.
Exercises
1.
As you saw in the previous section, the git branch command creates a branch (among other uses), but it does not change your active branch. The git switch <name> command switches (i.e. changes) the active branch.
(a)
What command will change your active branch to the new feature branch that you created in the previous section?
(b)
Use the git status command again now. What part of the output confirms that your feature branch is now the active branch?
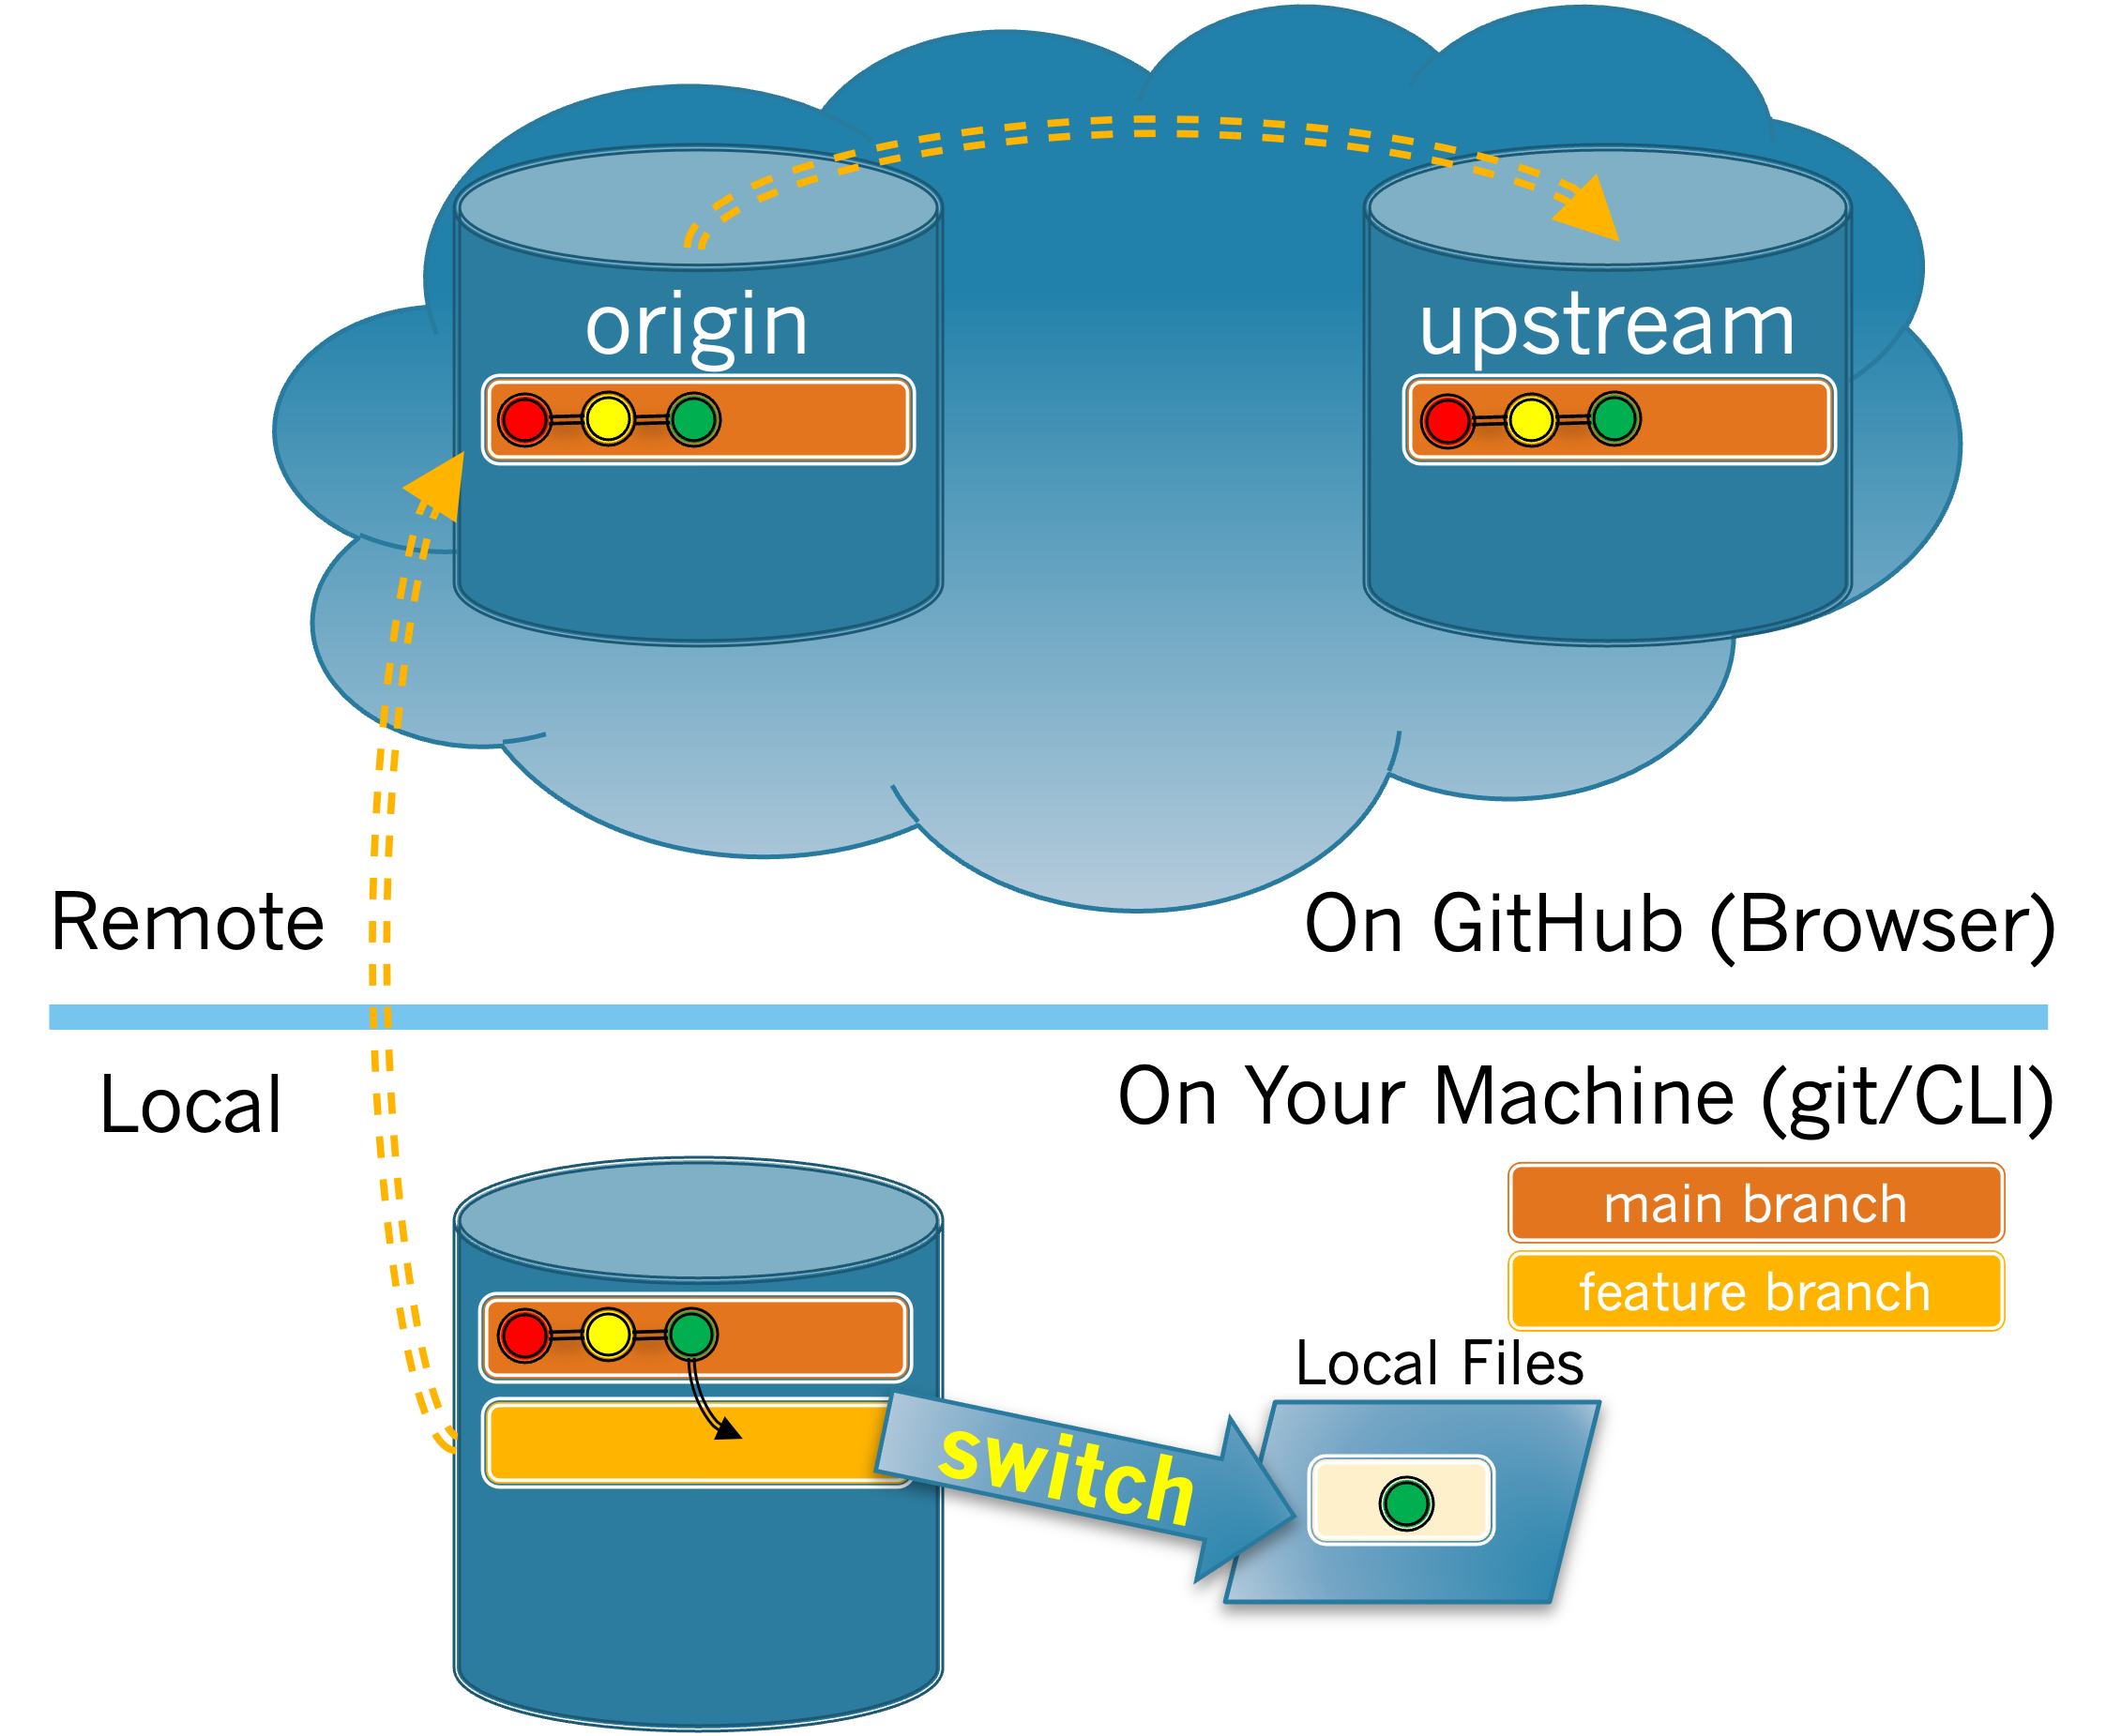
Figure Figure 3.3.1 illustrates this idea by showing that you have switched to your feature branch and that your Local Files have not been modified since the last commit on the main branch (drawn in green).
Figure3.3.1.Switch to Feature Branch.
2.
You can also switch branches using the git branch command.
(a)
Issue the git branch command now. You should see a list of branches. How can you tell which branch is the active branch?
(b)
git branch <name> will make name the active branch. Enter a git branch command that will make main the active branch. What command did you enter?
(c)
How do you know that main is the active branch?
(d)
In the next section you will be making changes to your Local Files. It is essential that you are on your feature branch before making any changes.
Enter a git branch command that will make your feature branch the active branch. What command did you enter?
(e)
How do you know that your feature branch is the active branch?