
10.5. Adding GUI Controls
Graphical user interfaces commonly have lots of different controls, often referred to as ‘user interface widgets’. These include buttons, drop-down menus, checkboxes, text input fields, sliders, radio buttons, menus, etc. For any GUI toolkit you use, you will need to look at the library of widgets available to you and browse the documentation to find out how to write the code to add these to your program screen. In most toolkits, there are a lot of configuration options for each widget, such as the size and colour, but there is also often a way to specify the look and feel of the whole set of interface controls at a global level. Similarly, you often need to think about placement - how do you decide where to put each control? Most sophisticated GUI toolkits have something called a ‘layout manager’ and you can use that to help with the layout. You might be thinking ‘this sounds a lot harder than I first thought it would be’ and you’re right. User interface design is somewhat of an art form. It takes practice and skill to design a good user interface. In this course though, we are keeping things simple by using the SimpleGUI module. The SimpleGUI module doesn’t provide options for customizing the look of the widgets or the layout. The user interface controls in SimpleGUI are very limited (just labels, buttons, and text input boxes), and they are only placed in the left hand control area, in the order you specify, from top to bottom. Let’s work through adding a few user interface widgets, continuting to use the starter code example on CodeSkulptr 3.
10.5.1. Adding Labels
Labels are considered static interface elements: they aren’t clickable and they don’t allow the user to do anything, they simply provide information. So, there is no event handler that needs to be attached to a label. Try adding a label to the SimpleGUI starter code. Flip back to the browser tab where the codeskulptr starter example is, and add a label, like this:
label1 = frame.add_label("This is a label")
If you add the above line of code after the line of code that creates the button, and then you run the application, you should see something like this:
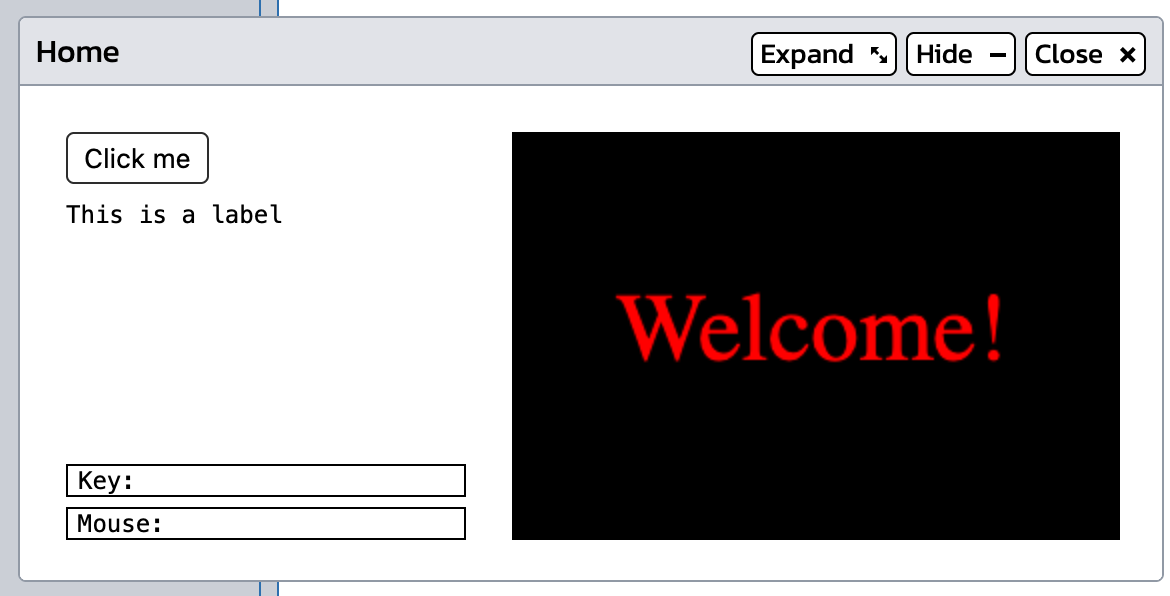
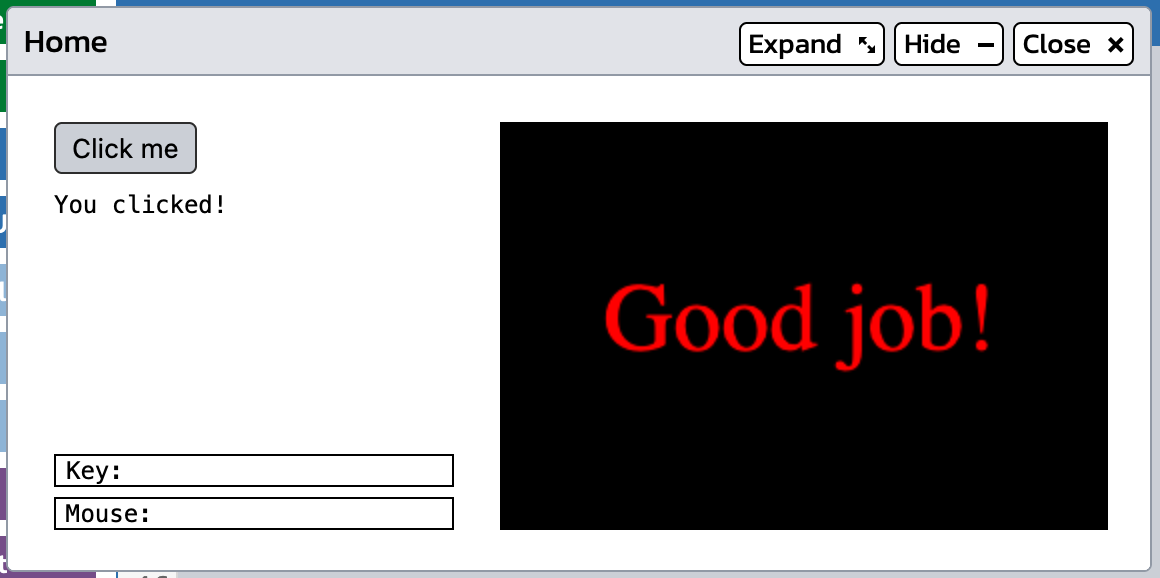
Now, let’s go back to the documentation and look at the related function for changing label text. Click on the ‘control.set_text()’ link on the documentation page (under the example code for adding a label). The documentation for the set_text() function shows some examples of how to use this function. Let’s make the example program change the label text when the user clicks the button. Add the following text to the click() handler:
label1.set_text("You clicked!")
Now, when you run the program and click the button, the program should update the text displayed on the canvas and it should update the label in the controls at the left, like this:
10.5.2. Adding Buttons
Let’s add a button that changes the canvas background color. The button that is in the starter code is not assigned to a variable, but we want our background color button to have a variable so we can change the button label. Add the following code:
bkg_button = frame.add_button("White Background", bkg_button_click)
Note that in this line of code we have said that we want a button and we want the button to have text on it that says “White Background”, and that we want the function ‘bkg_button_click’ to run when this button is clicked. So, we need to create a function that has that name. At the top of the script, add the following code to define this function:
def bkg_button_click():
    frame.set_canvas_background("White")
Run the simpleGUI starter script and make sure your button appears. Note that the SimpleGUI module places controls in the order you add them to the script. If you want the background button to be at the top, you have to specify it before the other button and the label. Try clicking the new button and make sure that the canvas background changes color.
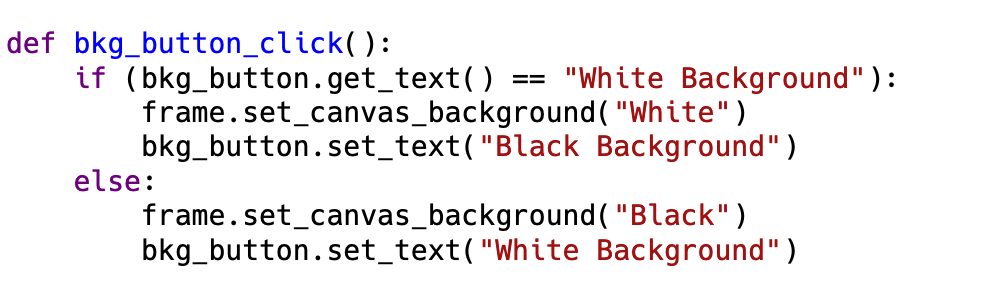
Now, to make this button better, we can turn it into a toggle button. To do this, we want to find out what the button says, change the color, then change the button to say the other color. So, if the button says “White Background”, we want to set the background to white, then change the button text to say “Black Background”. If the buttons says “Black Background”, we want to do the opposite. The new version of the bkg_button_click() function below does this. Make this change in your CodeSkulptr script and test it to make sure it works properly.
10.5.3. Adding Text Input Boxes
Text boxes allow us to get text from the user, similar to the way the Python input() statement does, but, we get to place the text input box (or multiple input boxes) in a window alongside other user interface elements, so this is much more useful. Let’s add a text input box that allows the user to change the message displayed on the canvas.
Look at the documentation page and see the description of the text input:
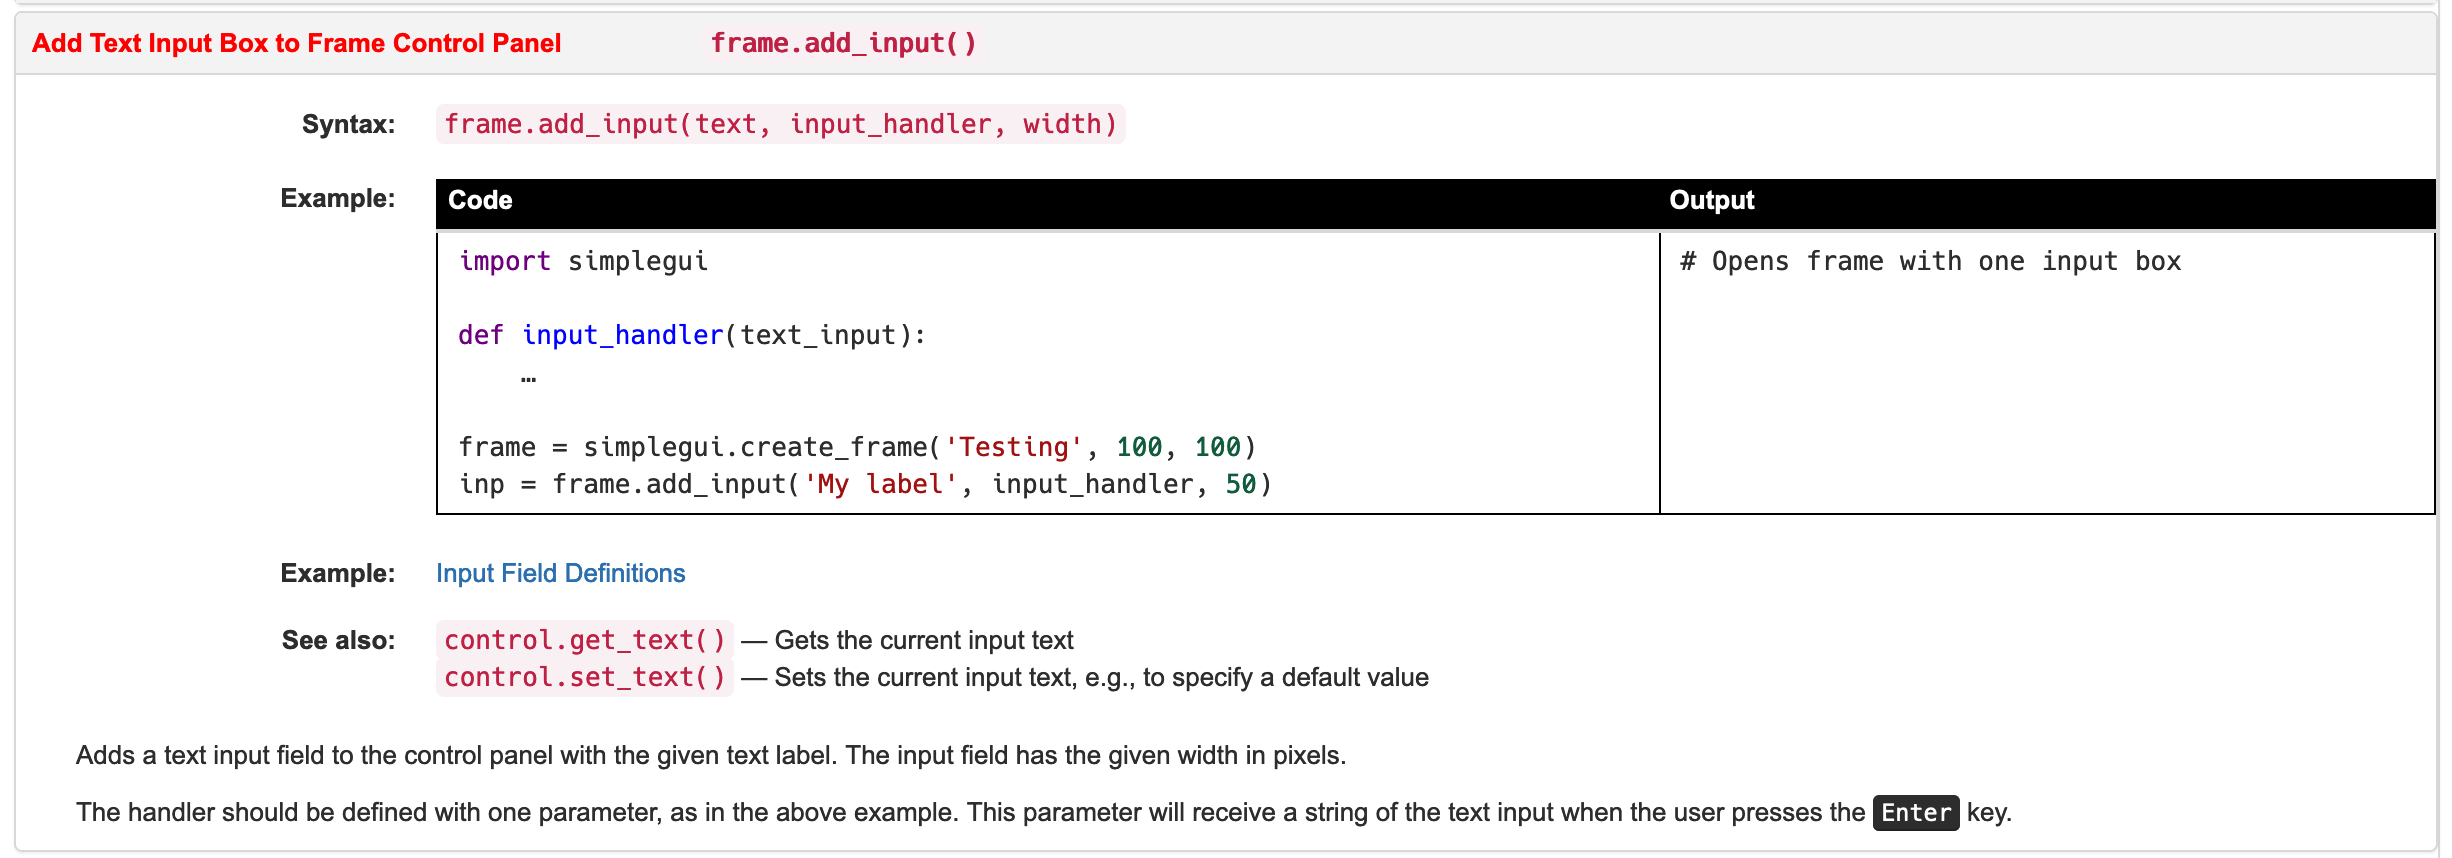
The syntax line tells us that we use the ‘add_input()’ method, and we have to give it three parameters: the label (that goes in front of the text input box), the name of the input_handler function, and a width for how wide to make the box. Note that at the bottom of this documentation, there is a line that says “the handler should be defined with one parameter…. This parameter will receive a string of the text input when the user presses the Enter key.” So, that means we need to create a handler for the text input box that has a parameter. In the example code, we see that it is customary to use ‘text_input’ as the name of this parameter, and to assign the text_input control that is created to a variable called ‘inp’.
We will follow these conventions and modify the code as follows:

On line 39 we add the input text box to the frame, and then on lines 25-27, we add code to change the canvas display message. Note that on line 25, the function definition for the text input handler has a parameter. When this code is run and the user types text in the box and hits enter, the operating system notifies the Python interpreter that a text input event happened and passes the typed text on. Python gives it to this handler code as the text_input parameter. Then our code uses it by assigning it to our global message variable. Every few milliseconds, the Python interpreter will automatically call the draw method to refresh the canvas in this window, so we don’t need to do anything specific to get the new message displayed, it will just happen automatically the next time the draw method is called. Since that happens so frequently, it will feel like the text change happens instantaneously when the user hits the Enter key.